To insert a visual image (such as a photo) into a WordPress post, choose the most appropriate steps below and ALWAYS insert source credits:
If you need to capture a screenshot of an image:
1) Capture a screenshot from your computer, crop, and save as JPG or PNG format on your drive.
2) In a WordPress post, click the Upload/Insert Image button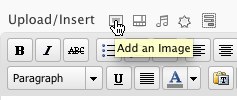
3) On the “From Computer” tab, choose the file, upload it to WordPress, add a caption with source credits, check the appropriate size, and insert into your post.

(Easier) If the image has already been uploaded to the web and has a regular URL address:
Then there is no need to capture a screenshot. Begin with step #2 above to add an image, but click the “From URL” tab, enter the full web address of the image, add a caption with source credits, and insert into post. (Apparently, the URL needs to end with a .JPG or .PNG or other standard image format for this to work.)

(Easiest) If the image appears in a Flickr photo feed:
WordPress has a fabulous shortcut. Simply copy the web address of the Flickr photo and paste it directly into your post, where it will appear automatically. In your narrative, be sure to add source credits.
To wrap text around a visual item, insert it immediately above the text you wish to wrap around.
To edit the image, float the mouse over the left-hand corner to reveal a button, and click it.

Under the edit image tab, change the alignment setting to left, center, or right, then update changes.

If further adjustments are necessary, switch from the Visual tab to the HTML tab to move or modify the code.
One thought on “upload visuals and wrap text in WordPress posts”