If you want to use Zoom with your class you may want to use the Zoom tool in Moodle to make it easier for your students to join the meetings.
When you create a meeting in Moodle the students will see those meeting links right in Moodle. If you create the meeting using the Zoom webpage or App you will have to share the meeting information separately using email or a calendar invite. Using the Zoom tool saves you that extra step and makes finding the link easier for students so they don’t have to dig through emails.
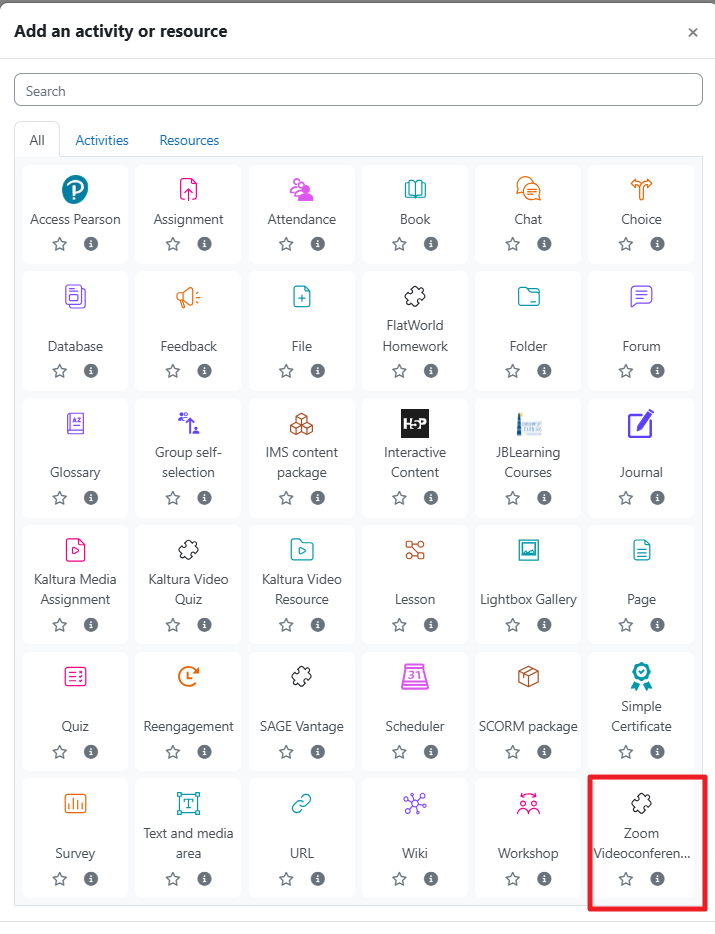
To add the tool:
You will only need to add the Zoom tool once for each course in Moodle and all meetings scheduled for that class will be accessible via that same link.
First, turn edit mode on and click the Add an activity or resource link in the section where you want to add the Zoom Meeting link. Click the Zoom Videoconferencing tool at the bottom of the alphabetical list.
 When you click the link you just added from the content area you will see a screen that is similar to the Zoom web page. Click Schedule a New Meeting to schedule your meeting dates and times. You can create a recurring meeting for all your course meetings at once. To set a recurring meeting start by setting the date and time for the first session. Then check the box for recurrence. Set it to weekly and select the days of the week your course meets. Then choose the last date you will meet. Alternatively, you can schedule a specific number of sessions rather than setting the date of the last one. You will set one or the other, not both. In the screenshot below the Zoom sessions are set to run M, W, F until 5/6/22.
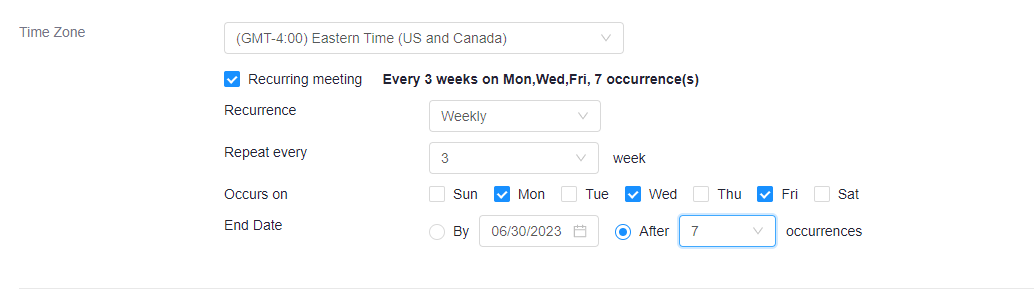
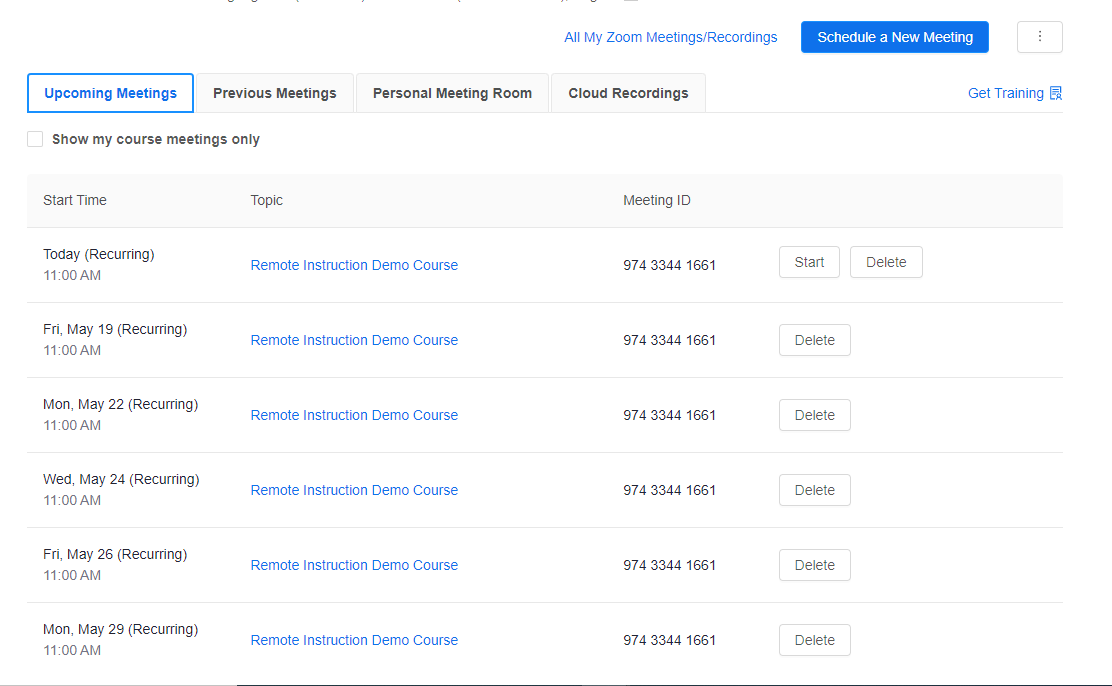
Once meetings are scheduled you will see them listed here. Next to the meeting, you will see a link to Start the meeting. Students will see the link to join a meeting. If you need to edit the meeting settings you can click the meeting title and then click Edit Meeting at the bottom of the page.

When you are in the Zoom tool you will also see a tab for cloud recordings. If you choose to record your class meetings to the cloud, which we highly recommend, you and the students will be able to see them here. Again this saves you the extra steps of getting the links from the Zoom web page and then sharing them with your students.