Posts Tagged ‘Washington Press’

27
Jul

Press Room: Our Blank Canvas

   Posted by:    in Uncategorized

Today we finished shifting the heavy metal map cases out of the press room, and we are now ready to clean, paint, and otherwise outfit it for production.  Still a long way to go–the Washington press is still in pieces (working on it), and the Vandercook will need some TLC.  But the stage is set, so to speak, and I still have hopes that I’ll get one or both presses in working condition this fall.  The room is small–only about 75 square feet, but we have heavy duty shelving just outside the room for supplies and equipment (paper, ink, furniture, etc.).

Tags:

28
Mar

Print shop equipment: planer and mallet

   Posted by: rring    in Uncategorized

We have two proof planers (or “planing blocks,” one large and one small), and one wooden mallet.  These are used in planing type–that is, leveling the type in the form (i.e., the term for set page(s) locked in and ready for printing) to make sure that it is standing on its feet.  If one letter is the least bit higher than the others on the bed, it will foul the impression. It is fascinating to me how much precision is required in every aspect of printing.  Think of this the next time you blithely press the print icon on your computer–in less than a second, you can accomplish what it took past generations years to produce.

Tags:

2
Mar

Print shop equipment: the composing stick

   Posted by: rring    in Uncategorized

We have some nice composing sticks already, but if we do get a real printing club going, we’ll need a few more.

This is a hand-held, three-sided tray in which type is set and justified to a specific measure.  Modern sticks are two-sided trays with an adjustable third side called a knee.  The types are placed against the long side of the stick.  We have three different sized sticks in the Watkinson, shown here.  To set type, you stand at the case (the tray of letters, each arranged in little boxes) and set each letter one at a time, backwards.  Depending on the font size, you can do several lines before placing them on the press to be locked in.

Tags:

So here is my first post on the equipment we already have in the Watkinson for our little print shop.  Thanks to Joe Laws (’12) for his work in organizing and photographing these for the blog!  Most of the definitions are taken from Rummonds’ Printing on the Iron Hand Press (1998), but I will not bother with quotes and page references–buy the book if you are that interested!

The line gauge is a rule or stick to measure the width and length of composition calibrated in picas [the printer’s unit of measure equivalent to twelve points–used to express the width and depth of the text and type page].  It is usually 72 picas long, and is also called a “gauge,” “pica gauge,” or “type gauge.”

NB:  The American Point System, which was adopted in 1886 by the United States Typefounders Association, is the standard in the U.S. and U.K.; it consists of two units of measure:  the point and the pica; the point =0.13832 inches (0.351 mm), and one pica = 12 points.  Type sizes and their spacing material is given in points; line lengths are measured in pica.

Tags:

31
Jan

An invitation to our Open House

   Posted by: rring    in Uncategorized

In my final letterpress class on Saturday I set and printed (with the help of my compatriots) 160 invitations to our open house, which will be sent to “local” members of our Associates.  I invite anyone on campus to come by on Friday, February 11 from 10am to 2pm for cookies, cider, and other light refreshments to see some of our new acquisitions in the cases and talk with me about some of the things we are looking forward to at the Watkinson.

Here is the printed invite:

Of the valuable lessons I learned during the setting of this piece (which took about an hour–at least 20 times slower than a 19thC typesetter!):  the relevance of the old saw “mind your p’s and q’s,” as well as a caution about working with old (worn), and possibly mixed type.  Several of the letters most used (“e” and “r in this case) needed to be switched out because they were not achieving type-height, and so were not printing.  Justification is another activity that will take a lot of time to get a handle on. 

On another level, I had occasion to think about the care and feeding of a printshop, and the materials one chooses to use.  If you are a “green” shop and use vegetable oil to clean ink off the type, it sticks together if not properly dried.  In general, frankly, it is best to run a tight shop, so to speak, and make sure everything is clean and in order when you leave, if possible.  It makes such a difference.  Here is a short video of me printing the invitation:

 Printing1

Tags:

24
Jan

Polymer plate printing

   Posted by: rring    in Uncategorized

On Saturday for the first time I printed from a polymer plate on the Vandercook at AS220 (part 2 of my 3-part class on letterpress printing).  Students were asked to choose an image (black and white, with no shading), and to send it to a pre-press servicing company which produced the film.  Here is the image I sent:

And here is the negative which was produced from it:

Then we placed the negative on top of a photo-sensitive polymer plate with a layer of backing, exposed it to fluorescent light for about 5 minutes to bake the image in, placed the plate in a warm water bath, lightly scrubbing “away” the film which was in the negative spaces with a flat, soft brush (mine took about fifteen minutes, since it was rather large, about 8 x 8 inches), and then used a hair dryer to finish the process.  Here is what the plate looks like:

 Once dry, you peel off a layer from the backing, to reveal an adhesive side.  The white stuff you see here was a little bit of paper that got stuck (by mistake) to the backing.  The reason for the adhesive is so that the plate does not move when you print (these are too flimsy to lock into a chase).

   Using a precision-milled, flat block of steel which is locked into the bed of the press, and guided by a grid printed on its surface, we placed our plates, inked the rollers with a nice smoky red (red mixed with a little black), and ran our prints.  Given the level of detail in mine, I think it turned out rather well for a first time effort:

For printmakers, the possibilities are greatly multiplied if you have access to this process.  This holds true for makers of books as well, of course.  In fact, it was this process which made it possible for me to issue a quarterly series while in my previous position.  The following cover was produced from polymer plates, which were created by scanning 19th-century type ornaments from specimen books, incorporating them into a computer-generated design, and producing negatives of that design:

Tags:

11
Dec

Move over, Gutenberg!

   Posted by: rring    in Uncategorized

In the bowels of the Watkinson I discovered a printing press. 

It is tucked into the corner of a former ladies’ bathroom (plumbing removed, pipes stoppered), behind a heavy cabinet full of type, and an old card catalog with glass slides depicting ruins and documents related to ancient Greece (cast-offs from the Classics department).

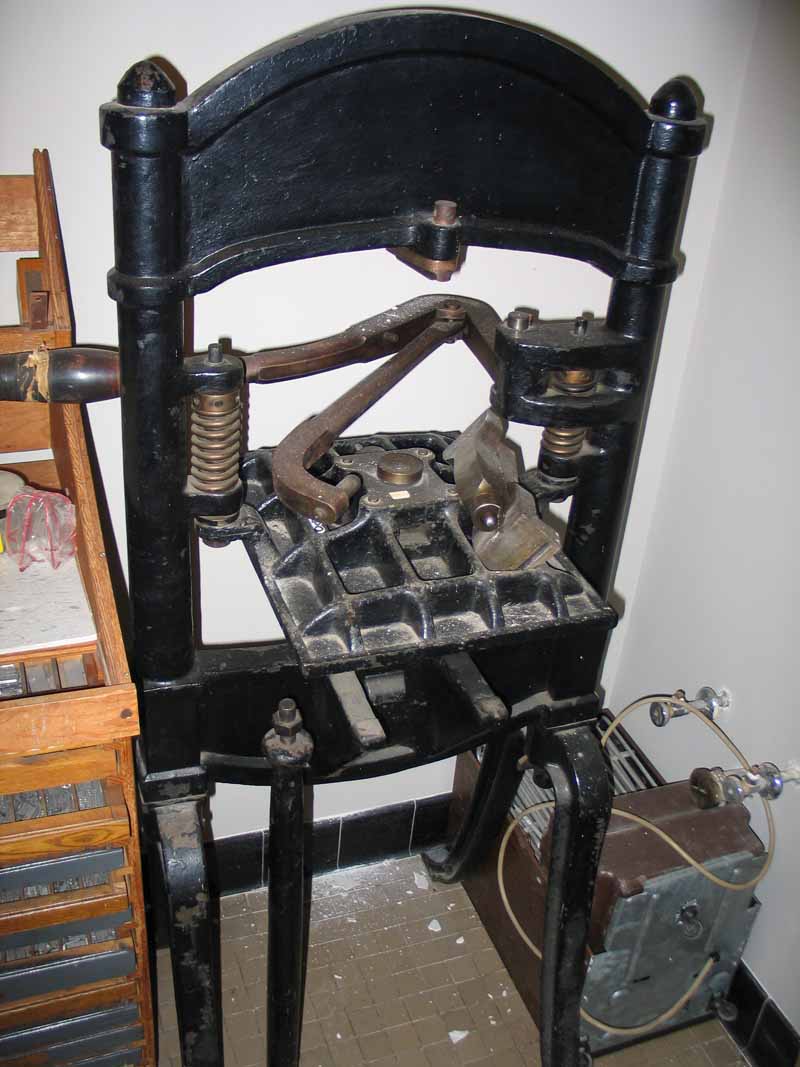
It is a Washington hand press, made by the Hoe company (aside from being an industrialist, Robert Hoe was also a very famous book collector). Samuel Rust first patented the design in 1821 (with an acorn frame), and re-designed it (the way ours looks) in 1829.  The Hoe Company bought the patent in 1835.  This model was one of the standard pieces of equipment for job-printing from the 1840s-1880s, and many of them, once they were “retired,” made their way into private press shops in the early 20thC.  This one was employed by the Cellar Press (Bloomfield, CT) from the 1930s to the 1960s. 

I say “discovered,” but of course the staff knew it was here.  It has been here since the late 1960s, when Mr. Peter Knapp (currently the College Archivist, but back then a reference librarian) had it removed from the Art department, and tried, in his pithy and self-deprecating words, to “mess around with it.”  It was donated, as many such presses were (and are), in the hopes  that it could still be useful, and not scrapped.  I find it heartening that this is happening–that the old technologies are not being cast out of hand (so to speak–if you know the language of printing, this will resonate as a pun).

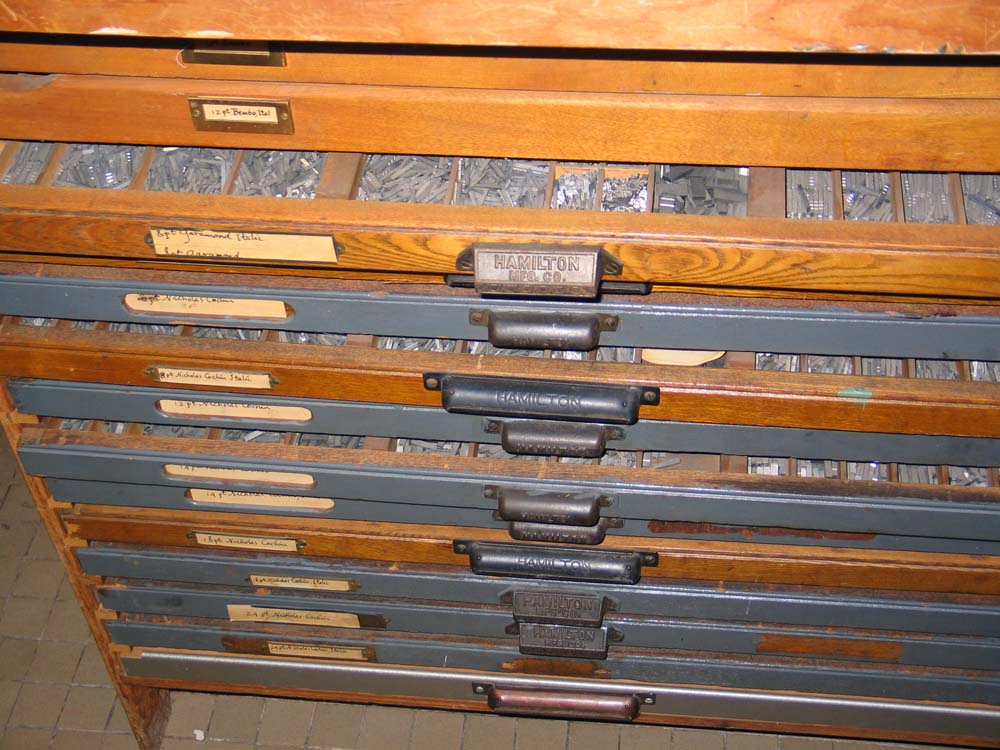
Immediately upon discovering the press and the dozen or so trays of type (mostly Garamond, 10 to 24 pt), I began scheming.  That’s what I do.  I try to exploit every potential asset that comes into my hand.  So here, I thought, is an opportunity.

Most special collections programs use their historic presses to focus on printing as it relates to the “book arts” or “book history.”  That will certainly happen at Trinity, but more than that, I want to focus on using the press as a centerpiece for discussing writing and publishing (its history and future).  This seems to me a more forward-looking approach, and I hope it will engage a broader range of students (not just the artists and book-nerds, but all writers and readers on campus).  I’m just settling down with Richard Gabriel-Rummonds’ Printing on the Iron Handpress (1997), the definitive work on the subject, and fortuitous to me for the following reason:

“This manual is intended primarily for users of Washington-style handpresses, although many of the procedures will also be applicable to most other makes of iron handpresses, and some of the procedures will even be helpful for printers using manually operated cylinder presses, such as Vandercook proof presses.  I have singled out the Washington-style press because it is the most frequently found hand press in the United States” (Preface).

Up to now, I have only studied printing in the abstract–its history, and the basic outlines of its practices during the handpress period (1450-1850).  I intend to use this blog to document every stage of my transformation from an ignorant neophyte to a (hopefully) skilled amateur printer.  Stay tuned!

Tags: